In this article, we will explain how to format Tesla USB for use with Tesla Sensor Cameras and Sentry Mode.
To make sure you don’t get confused, we’ve divided the whole procedure into several parts. It’s pretty quick, you only need ten minutes of free time.
You got that right, there’s nothing complicated here.
In addition to describing the steps themselves, we will tell you about the most frequent problems users have to deal with during the formatting process and how to cope with them.
Where are the USB Ports on Tesla
We were very surprised to learn that many users don’t even know where to look for the USB ports in their cars.
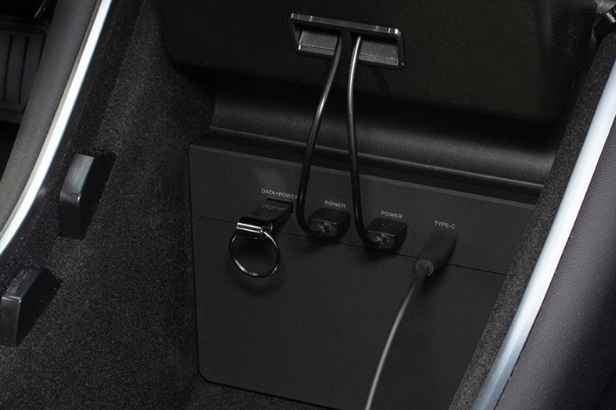
If you are one of them, we will now tell you where you should find the USB port in every Tesla model.
Model 3/Y
One of the USB ports is located on the rear glass of the center console compartment.
Another one you can find behind the glove box. This is, in our opinion, the most convenient place to connect the USB port, which you will need for proper Sentry Mode operation on the car or for the camera.
Another, last USB port, you can see at the back of the center console.
Model S/X
Both ports are located at the front of the center console.
How to Format USB Drive From Tesla
Before you begin formatting, you should note that Tesla only works with exFAT, MS-DOS FAT, ext3, and ext4 USB formats.
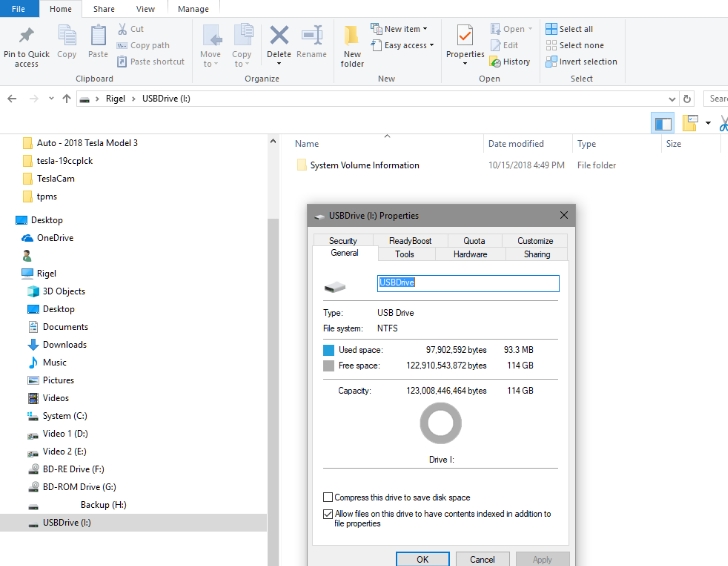
Many 32 GB USB drives sold in stores are already in exFAT format by default. However, USB drives with more than 32 GB of storage are sold in NTFS format, which Tesla refuses to work with.
It follows that if you have to work with a USB drive with a larger capacity, you’ll need to reformat it to any of the car-compatible types, but we’ll tell you about that a bit later.
Let’s not take too long and get down to the formatting process.
Attach a flash drive, SSD, micro SD, or any other device that you want to format to any Tesla USB port.
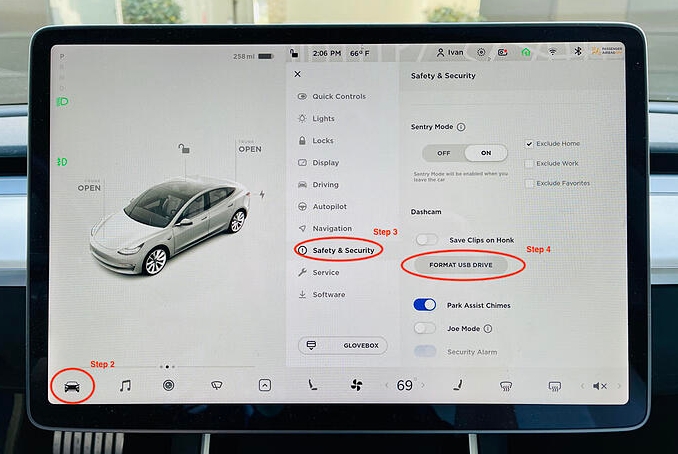
Next, on the touchscreen, open Controls, go to Security and click Format USB Drive.
You will see a box notifying you that all data will be erased immediately. Click on Accept if you have nothing of value on the USB drive.
The entire procedure will completely erase everything on the USB, then format it into a Tesla-friendly format and place the TeslaCam folder on the flash drive.
How to Properly Format a USB Drive for Tesla From Windows 10
Here are a few ways to format a USB flash drive using a computer. You can choose and use any method that suits you best.
How to format a USB drive using File Explorer
The first standard way to format a USB flash drive in NTFS or FAT32 is to use the capabilities of the operating system itself. For standard formatting, you will need to do the following:
- Connect the USB drive to the desired connector (if you have USB 3.0 or 3.1, the socket will be indicated in blue).
- Open Explorer and find your drive. Right-click on it and select “Format”. A small window will appear in which you need to set certain parameters.
- Specify the type of file system, the size of the media (CHECK IT! Incorrectly formatting the drive, you can lose free space), the volume label (the name of the flash drive), and click “Start”.
We confirm the deletion of data and the complete formatting of the media.
Important! When choosing the FAT32 file system, you can write information up to 4 GB and no more to a USB flash drive. The NTFS file system in Windows 10 allows you to store more information than FAT32.
How to format a USB drive in the Computer Management console
If you cannot format the drive in the standard way, you should use the capabilities of the Disk Management section. The formatting steps will be as follows:
- Right-click on the “Start” icon and select “Disk Management”.
- A new window will open. We find a USB flash drive among the presented drives. We define it by volume or name. Right-click on the object and select “Format”.
- A new window will appear. Specify the file system, and cluster size, uncheck “Quick formatting”, and you can set the name of the drive, and click “OK”.
It is important to note that using this formatting method, you can select the cluster size. This is very important since the speed of reading data and filling the drive depends on this parameter.
How to format a USB flash drive at the command line
There are cases when the flash drive does not want to be formatted. To do this, you can use the old disc part formatting method or try the following method.
- Run the command prompt with administrator rights on Windows 10.
- Enter the command “format H”, where H is the letter of the disk that will be formatted.
- Next, connect the drive and press “Enter”. We are waiting for the formatting result.
You can also format the drive using the command line and the flashnul utility. To do this, download the program and unpack it to disk C. Next, we perform the following:
- Run the command line with admin rights, not just the command line. Enter “cd flashnul”, and then “flashnul.exe “.
- A window with possible operations will appear. We choose the appropriate one. We recommend paying attention to the “-I” key, which allows you to test the device controller and at the same time wipe everything that is there.
- Now enter “flashnul –p” to view all connected media.
- Enter “flashnul H: -I” and press “Enter”.
Formatting has been performed.
How to Properly Format a USB drive for Tesla From MAC
Connect the flash drive to the device.
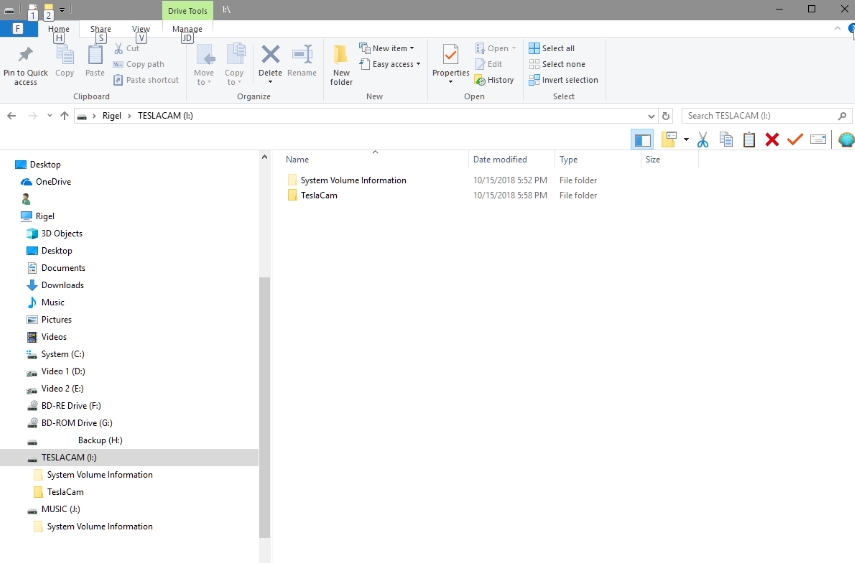
In the Finder, you can see the contents of our flash drive.
Now, let’s go to the main point – formatting. This can be done in several ways, starting with the simplest one, the disk utility.
Disk Utility is an application built into the Mac OS that lets you manage your hard drives, USB flash drives, and SD cards. You can also use it to erase data.
You can launch Disk Utility in two ways: by opening Launchpad (usually located in the Dock).
If you have a MacBook with a touchpad, it has a Launchpad icon next to Siri.
If you can’t find Launchpad there or there, you can gesture to it – use your thumb on the bottom and your index finger, middle finger, and ring finger on top to pull it toward the center of the trackpad.
In the window that opens, there are a folder “Others”, where the disk utility is actually located.
The second way to run the disk utility is many times easier – call Spotlight by pressing the key combination CMD + Spacebar. In the field that appears, start typing “disk utility”.
To format, you need to select the desired device and then click “Erase” in the panel above.
A window will appear where you can specify the name of the drive and select the format.
We will choose ExFAT. We press “Erase” and if the formatting is successful, we will get a notification.
Common Tesla USB Formatting Issues
Perhaps, let’s say a trivial point, but SD-flashes has a special lever, which blocks writing information to the flash card (exactly as well as deleting and formatting). Check whether it is in the Lock position (it means locked).
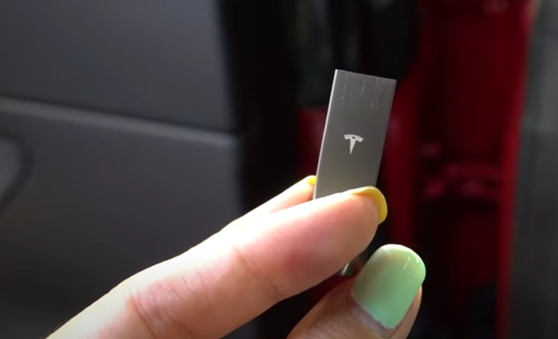
On USB-flash drives, such a lever is found much less often (and usually on flash drives from Chinese little-known manufacturers). Pay attention to the icon itself: if the lever is in the “closed lock” position – it means the flash drive is write-locked.
If you have an antivirus program installed on your computer, scan the drive for malicious files. Usually, unwanted software blocks the format function to prevent the possibility of quick virus removal.
Most anti-viruses, once installed, embed the scan item in the context menu. Therefore, to run the scan, simply highlight the drive, right-click on the drive, and select Anti-Virus Scan.
Some flash drive manufacturers release service programs for servicing or formatting the drive. A diagnostic function is built into the program, which identifies problem memory areas and/or flushes the controller. Such utilities are free, and more often downloaded from the manufacturer’s official site.
Standard formatting in Windows is limited in its capabilities. And the formatting is not always possible, especially in case of software conflicts or crashes. In this case, it is better to use third-party formatting programs, as they offer more options when working with the drive.
Because of improper use of the medium, often fails the controller, which is responsible for the flash drive. Frequent writing also wears out the memory, which together or separately is a major obstacle to formatting. In this case, third-party formatting programs, with active or passive recovery functions, can help.
If all other methods didn’t help, you will most likely have to try to reflash the flash drive. This must be done carefully because if you choose the wrong firmware, you will ruin the flash drive and then it cannot be recovered.
Video: How to Format Tesla USB
This video is a fully updated guide on how to format USB drive in a Tesla. This is for every model and also includes an in-car setup. Please check out the time codes so you can go right to your computer setup process.
Best USB for Tesla Dashcam & Sentry Mode
Samsung has decided to update its external SSD model and introduced the T7 Touch – an improved drive with higher performance.
And to give it additional appeal against the proliferating competitors, it added a unique feature – hardware cryptographic data protection with fingerprint authorization. Such solutions are not yet available on the market, and thanks to this Samsung T7 Touch can count on an additional share of attention from buyers.
However, the device does not disappoint with the announced numerical characteristics. Inside the new drive – NVMe-controller, so do not be surprised that the passport speeds compared to the T5 increased approximately twice – up to 1 GB / s.
As a result, the Samsung T7 Touch should be clearly more pleasant in practical use. When transferring files to it, you’ll have to wait much less, and you can access encrypted data on any device (including even TVs) without having to install any additional software.
At the same time, the Samsung T7 Touch retains the T5 aesthetics that users love: the drive comes in an aluminum enclosure with dimensions adjusted to the size of a credit card.
The only disappointment is that the T7 Touch is more expensive than any of Samsung’s SATA and NVMe models, while the older version of the portable drive, the Samsung T5, is available for as much as 20% less.
But don’t forget that with the T7 Touch, the manufacturer offers not only a faster but also a more functional model. In addition, those who want to save money in the second quarter will be offered a modification of the T7, deprived of the biometric sensor, which will obviously be more affordable than the T7 Touch. Here is how to program tesla garage door opener.

