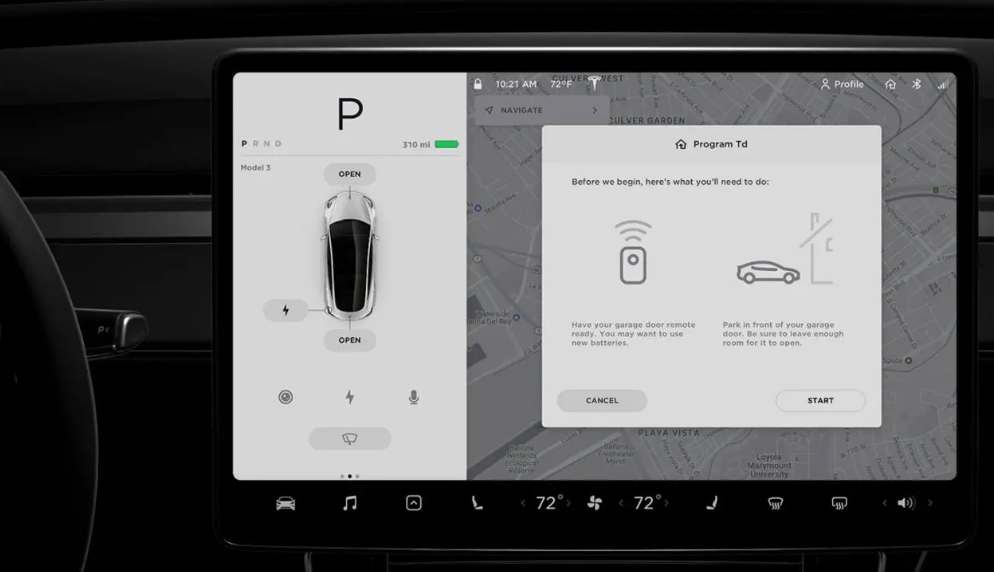
The Tesla has the ability to open the garage door by itself when you return home from somewhere. The gate can also close by itself when you leave your car in the garage. This works when the GPS signal communicates with the Homelink module, which is what opens the garage door. We will tell you how to program Tesla garage door opener.
How to Tell If Your Tesla Has HomeLink Device
All Teslas have the ability to open garage doors via Homelink, but not every Tesla vehicle has a HomeLink installed module.
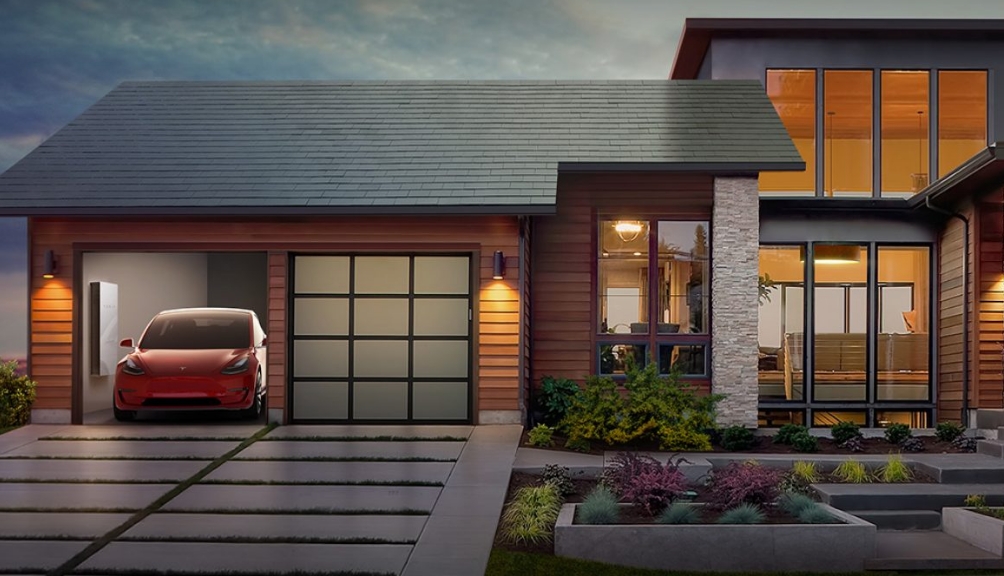
If you own a Tesla Model S or Model X, you don’t have to worry, your car already has the garage door opener feature.
If you bought a different Tesla model, however, what comes with it will be slightly different from those cars. Tesla Model 3s were equipped with a Homelink module installed exclusively until spring 2019.
After that time, this module became an optional service that is offered after purchase. The Y models don’t have this feature at all unless you have it installed after purchase.
Regardless, the easiest way to find out if your Tesla has a garage door opener module is to check the data on the Tesla’s display. All Tesla owners have to do is open the Controls section, then open the Software tab, and tap on More Vehicle Information.
A screen will appear in front of you that will show you many interesting things about your Tesla and the modules it includes.
Next to the sign Garage Door Opener, you’ll notice either Not Installed or Homelink. The second option will have a number next to it, which does not matter in our case yet, the important thing is that it indicates that there is a Homelink module and you can configure your Tesla to open your garage door.
Program HomeLink Garage Door Openers
If you have a garage door opener in your car, you have the ability to set your Tesla to automatically open your garage doors as you approach your home.
In addition, you’ll be able to adjust the doors individually via the Tesla’s touch screen and control all of your garage doors yourself via the Tesla app.
To set up your Tesla, you’ll need the remote control that always comes with your garage door opener, or just getting access to the main garage door motor for setup and programming.
If you are setting up your Tesla using the button on the garage door opener motor, make sure there is nothing in your way nearby and you have purchased a sturdy ladder because the whole process will take you a fair amount of time. If you find a friend or family member to help you, this procedure will go much faster.
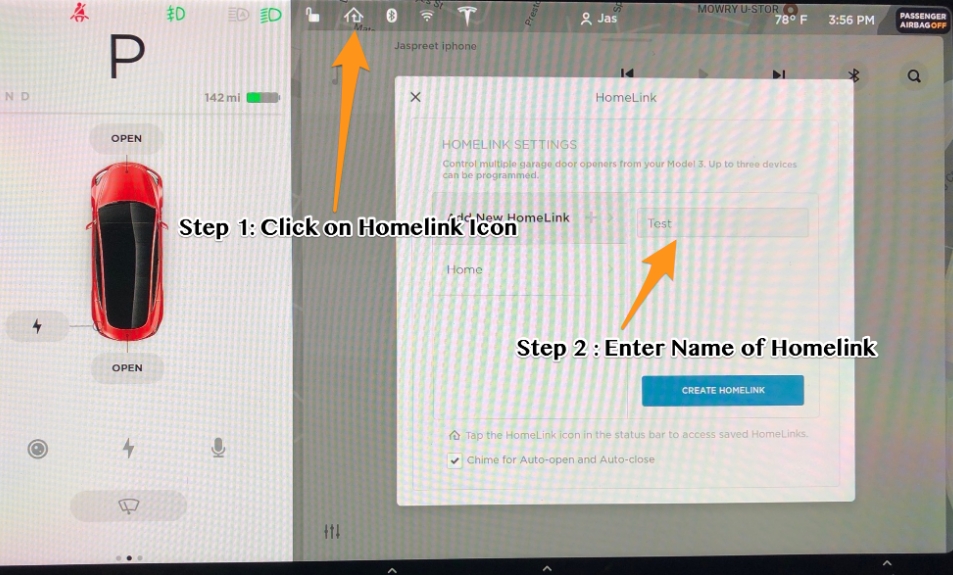
To get started, select the Homelink icon at the top of your car’s touchscreen, which looks like a little house with an arrow, then go to Homelink Settings.
The Homelink screen will appear in front of you, giving you ample room to add new garage doors to your system, or to configure compatibility with various related accessories. For example, controlling lighting at night or the degree to which your garage door is raised.
To begin programming, you click on Add New Homelink, come up with a name for your gate, such as Front Garage, and then click on Create HomeLink.
Standard Mode or D-Mode
You will then need to select the HomeLink transmission mode. You need to select the mode depending on where you are and the way you want to program the Tesla.
Standard mode is the mode most commonly used by users. If you are at a loss as to which mode you want, just choose it as it is the easiest to set up and use.
In this mode, you will need a remote control for your garage door.
D Mode – This is very common in North America. You will need to turn D mode on if you use Learn or Smart button on your garage door remote a lot.
UR mode – this is slightly identical to the previous mode but more common in Asia and Europe. You will also need to use the Learn button on the garage door opener motor.
This is the time to decide on a choice and then confirm it by pressing Set Mode.
You should then be sure to check that your Tesla is standing close to the garage.
The Tesla will lock its location so that it is the location from which to open the garage door when you return from your trip.
In the future, you will be able to record exactly how many feet to that point the Tesla will send the signal that will open your garage.
Programming With Standard Mode
Now we must start the programming by pressing the button on the dashboard Start. Then you must leave the Tesla, holding the remote control for the garage door and pointing it to the front of the car at about the level of the passenger side.
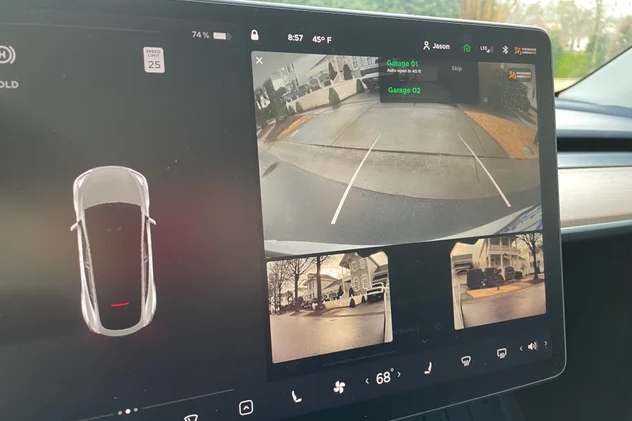
Next, you need to press and hold the button that is responsible for opening the garage door on the remote, without releasing it. The whole procedure takes about thirty seconds.
You will know that the setup is over when the Tesla starts flashing its lights rapidly.
You should consider that the garage door will be in constant motion during this time, so keep foreign objects away from it so as not to damage the mechanism.
You’ll know the signal has been successfully received when you see the headlights flashing. Until then, do not release the button on the remote control.
You should then get back into the Tesla, make sure by seeing the message on the screen that everything is complete, then simply press the Next button.
If you have the standard mode enabled, what you do depends on whether or not your remote has QuickTrain compatibility.
If it is, all you have to do is click Continue, but if it is not, you will have to click Learn on the garage door opener motor.
If you are not sure, you should try pressing Continue and evaluating the HomeLink. If the function does not start, then you are now certain that your remote does not support the QuickTrain function.
Programming With D-Mode or UR-Mode
If you have enabled D-Mode or Ur-Mode in order to program the Tesla, you will need to allow yourself access to the garage door opener motor.
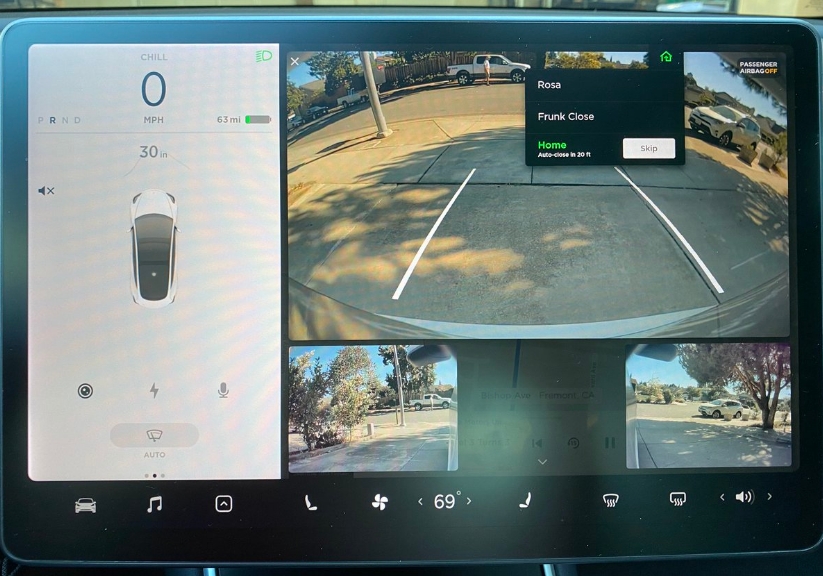
The Tesla will show you a message asking you to press Learn or Smart on the garage door motor.
This is a faintly visible button that is located in various places, most often under the cover or near the door motor. To make it easier to find, manufacturers make it in bright colors. It can be orange or red, but there are many colors.
When you have found the button and pressed it, you need to get back in the car and press Continue on the touch screen.
This procedure is needed to prevent trespassing in your garage and using your garage door without your permission.
Testing the Button
Once you have fully completed the garage door programming procedure Tesla will require you to do a small test.
Tesla will first send you to test the garage door button in your car to know for sure that everything is working correctly, if something goes wrong you will be returned to the very first step or prompted to choose another way if one of the modes did not work.
Once you are able to open the garage door while sitting in your car, you must find the save button and press it.
You will then be prompted to adjust the settings to suit your own needs. The degree of adjustment of the settings depends on the type of garage door installed.
Auto Fold Mirrors
This feature activates your Tesla to automatically fold the mirrors before you enter the garage. You should be aware that this can make it quite a challenge to then leave the garage, especially if you have to do so in reverse.
Only turn this feature on if there is a risk of damaging the side mirrors when entering the garage.
Auto Open When Arriving
The car combines the GPS signal with the HomeLink module and will open the garage door by itself when you get close to a certain point in front of the house.
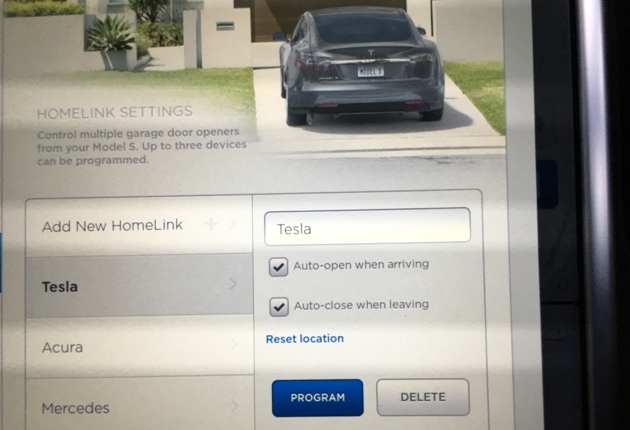
This is a very nice feature, and we would advise everyone to use it if you have special security sensors at the bottom of your garage door that prevents it from closing prematurely if something interferes with it.
In addition, you can set the distance from which your Tesla will open your garage door when approached.
It’s convenient to see when your garage door swings open before you reach it, so you don’t have to wait long or open it yourself.
That said, the distance that becomes acceptable to you depends directly on the degree to which your garage door opener signals and how many feet it catches the signal.
We would advise you to set the distance so that you can see the garage door, so that sometimes when you come home from somewhere, it won’t happen that the garage has been opened by one of your relatives.
Your Tesla will still send an automatic signal, but it will start closing the garage right in front of you.
You should be aware that the Tesla is not capable of understanding whether your garage door is currently open or closed, and, it’s hard to admit, but HomeLink will still automatically send a signal that will either open your garage door or close it.
You need to consider this for your safety and convenience, but the feature itself worked smoothly in all tests, especially if you set the distance correctly.
Tesla advises that you only run the auto-open and auto-close options when your door has special safety sensors. These are usually located at the bottom of the gate.
You should also know that Tesla calculates the garage door location point based on where you parked your car when you set up this feature and did the programming.
However, you can always change this location by going through all the steps we have described above again.
Auto Close When Leaving
This is the exact opposite of the open option. Your Tesla signals itself to close the garage door when you leave for business or a long trip.
With all of these options, you have to take precautions because they are convenient, yet direct. Watch your garage door carefully while automatically opening or closing it to avoid damaging it or foreign objects nearby.
Reset Location
If your Tesla was not parked at the correct location in front of the garage door when you were programming, your vehicle will remember the wrong garage door location.
To correct this flaw, you need to click on Reset Location when you are stopped in front of the garage door, and the Tesla will change the old location to the new one on its own.
If you have more than one garage, you need to repeat this procedure with each garage.
Chime for Auto-Open and Auto-Close
In the depths of the HomeLink settings, you can still choose whether or not the Tesla will activate a special beep before the car opens or closes the garage door.
If you turn it on, the Tesla will activate a small sound similar to a doorbell before the garage door opens or closes.
It’s a small indication that the gate has started to open and you’re allowed to move in. It is also a very handy thing to cancel this action in time if the gate is already open. After a short beep, you will see a cancellation icon on the HomeLink screen.
Limited to 3 Garages or Devices
The HomeLink module that is built into your car can only remember three HomeLink devices. Unfortunately, the module is only capable of this, and Tesla is not able to do anything about these limitations.
Add or Install Garage Door Opener in Your Tesla Model 3
If you own a Tesla Model 3 or Model Y that does not have a garage door opener added by default, you have the option of buying one as an accessory directly from Tesla outlets. Here is
The bad news is that you can’t buy it right away at the time you buy your Tesla, but you have to do it later at a dedicated Tesla service center.
The price for everything you need plus placement of the module will be just over three hundred dollars.
If Tesla provides mobile service in your area, this is a comfortable and easy way to get such a convenient feature.
Video: How to Program Tesla Garage Door Opener
In this video, you can watch how to program Homelink.
Bonus: How to Program HomeLink in Other Cars
The HomeLink buttons can simply be re-programmed individually, but they cannot be erased one at a time. To erase the existing programming of all three buttons at once, follow these steps:
Press and hold the two outside buttons I and III until the LED flashes after approximately 20 seconds.
Press the appropriate HomeLink I, II, or III button – which you would like to program – and hold it down for about 20 seconds until the HomeLink LED slowly begins to flash. Do not release it until step 4 is complete!
NOTE: If the erase procedure was previously used, you can teach the HomeLink unit directly from the remote control when you press buttons I, II, or III and the LED flashes slowly without waiting 20 seconds.
When the LED begins to flash slowly, continue to hold the button down and hold the remote control of the device you wish to teach about 0 – 30 cm away from the HomeLink transmitter unit.
NOTE: The distance between the remote control and the HomeLink Transmitter Unit depends on the system being programmed. It may be necessary to make several attempts at different distances. Try each position for at least 30 seconds before moving to another position.
While continuing to hold the button down, activate (press) the remote control and do not release
The HomeLink LED will begin to flash, slowly at first and then quickly. When the LED flashes quickly, release both buttons.
Fast flashes indicate successful signal programming with the new frequency coding. To program the two remaining buttons, follow steps 1 through 4 again.
RollingCode System
Your vehicle must be within range of the gate opener or garage door opener. Be sure to follow the safety rules even when synchronizing the floating code.
Locate the teach button (programming button) on the gate opener or garage door opener head unit. The exact location and color of this button may vary depending on the brand of gate opener or garage door opener.
Press the teach button (programming button) on the gate opener or garage door motor head unit (which normally activates the “teach” light).
NOTE: By performing step 2, you usually have 30 seconds to start step 3.
Forcefully press and release the programmed HomeLink button. Press and release the HomeLink button a second time to complete the learning process. (Some gate or garage door openers may need to perform this procedure a third time to complete the learning process.)
The gate opener or garage door opener should now recognize the HomeLink signal and actuate when the HomeLink button is pressed. Here is how to open tesla glove box.

